
Giving Your Vibe Code Setup Continuity v2
Giving Your CLI Agent Some Memory
Now that we have a functional Claude Code environment, you can easily install Codex AI (ChatGPT’s command line tool) and Gemini CLI. How? Ask Claude how to do it, of course. But before we dive too far down this road, there are a few more setup things we should do.
Let’s create an environment where you can do some “real” work. By this I mean that Claude Code has the ability to read and write files on your local computer. What’s more (with permission), Claude Code can also run shell commands. This can be extraordinarily powerful, as hopefully you will soon see.
Setting Up a Memory File
There are a few files you’ll want to add to your agent work directory. These files give Claude Code standing directions—they’re read every time the app starts up. Some files also act as contextual memory artifacts. Claude Code doesn’t keep memory from run to run, so these files act as quick-start guides when you have to quit the app and restart it.
As an example of working faster with knowledge, I asked Claude, “What does each of these files do?” And here’s the answer:
When working with multiple AI coding assistants (Claude Code, Gemini, OpenAI Codex), a shared workspace with context files helps each agent understand your project. This guide explains the purpose of each markdown file in the ~/agentwork repository structure and how they enable persistent context across sessions.
At the end of this post, I’m going to include a comprehensive guide to the following files:
- AGENTS.md - all agents read this file for conventions and instructions
- CLAUDE.md - Claude Code reads this file to get personalized context
- CHATMEM.md - helps Codex AI recover its session state
- MEMORY.md - any agent can read this to understand project history and current work
- README.md - the project overview
You can start simple, with an AGENTS.md file in addition to the README.md file you got by default from git when you created your repository.
In fact, the simplest thing you can do now is create an AGENTS.md file, but it’s important that you DON’T PANIC! Making files is fun.
Note: Working with files. To get the real power of vibe coding and working with AI that can actually do work on your local computer, you will need to learn how to manage and edit files. Two tools that are invaluable to me:
- A dual-pane file explorer like Commander One Pro, Marta, or Midnight Commander
- An integrated development environment (IDE) I highly recommend Marta app for MacOS: https://marta.sh/ and Visual Studio Code (VSCode) for MacOS: https://code.visualstudio.com/
Marta
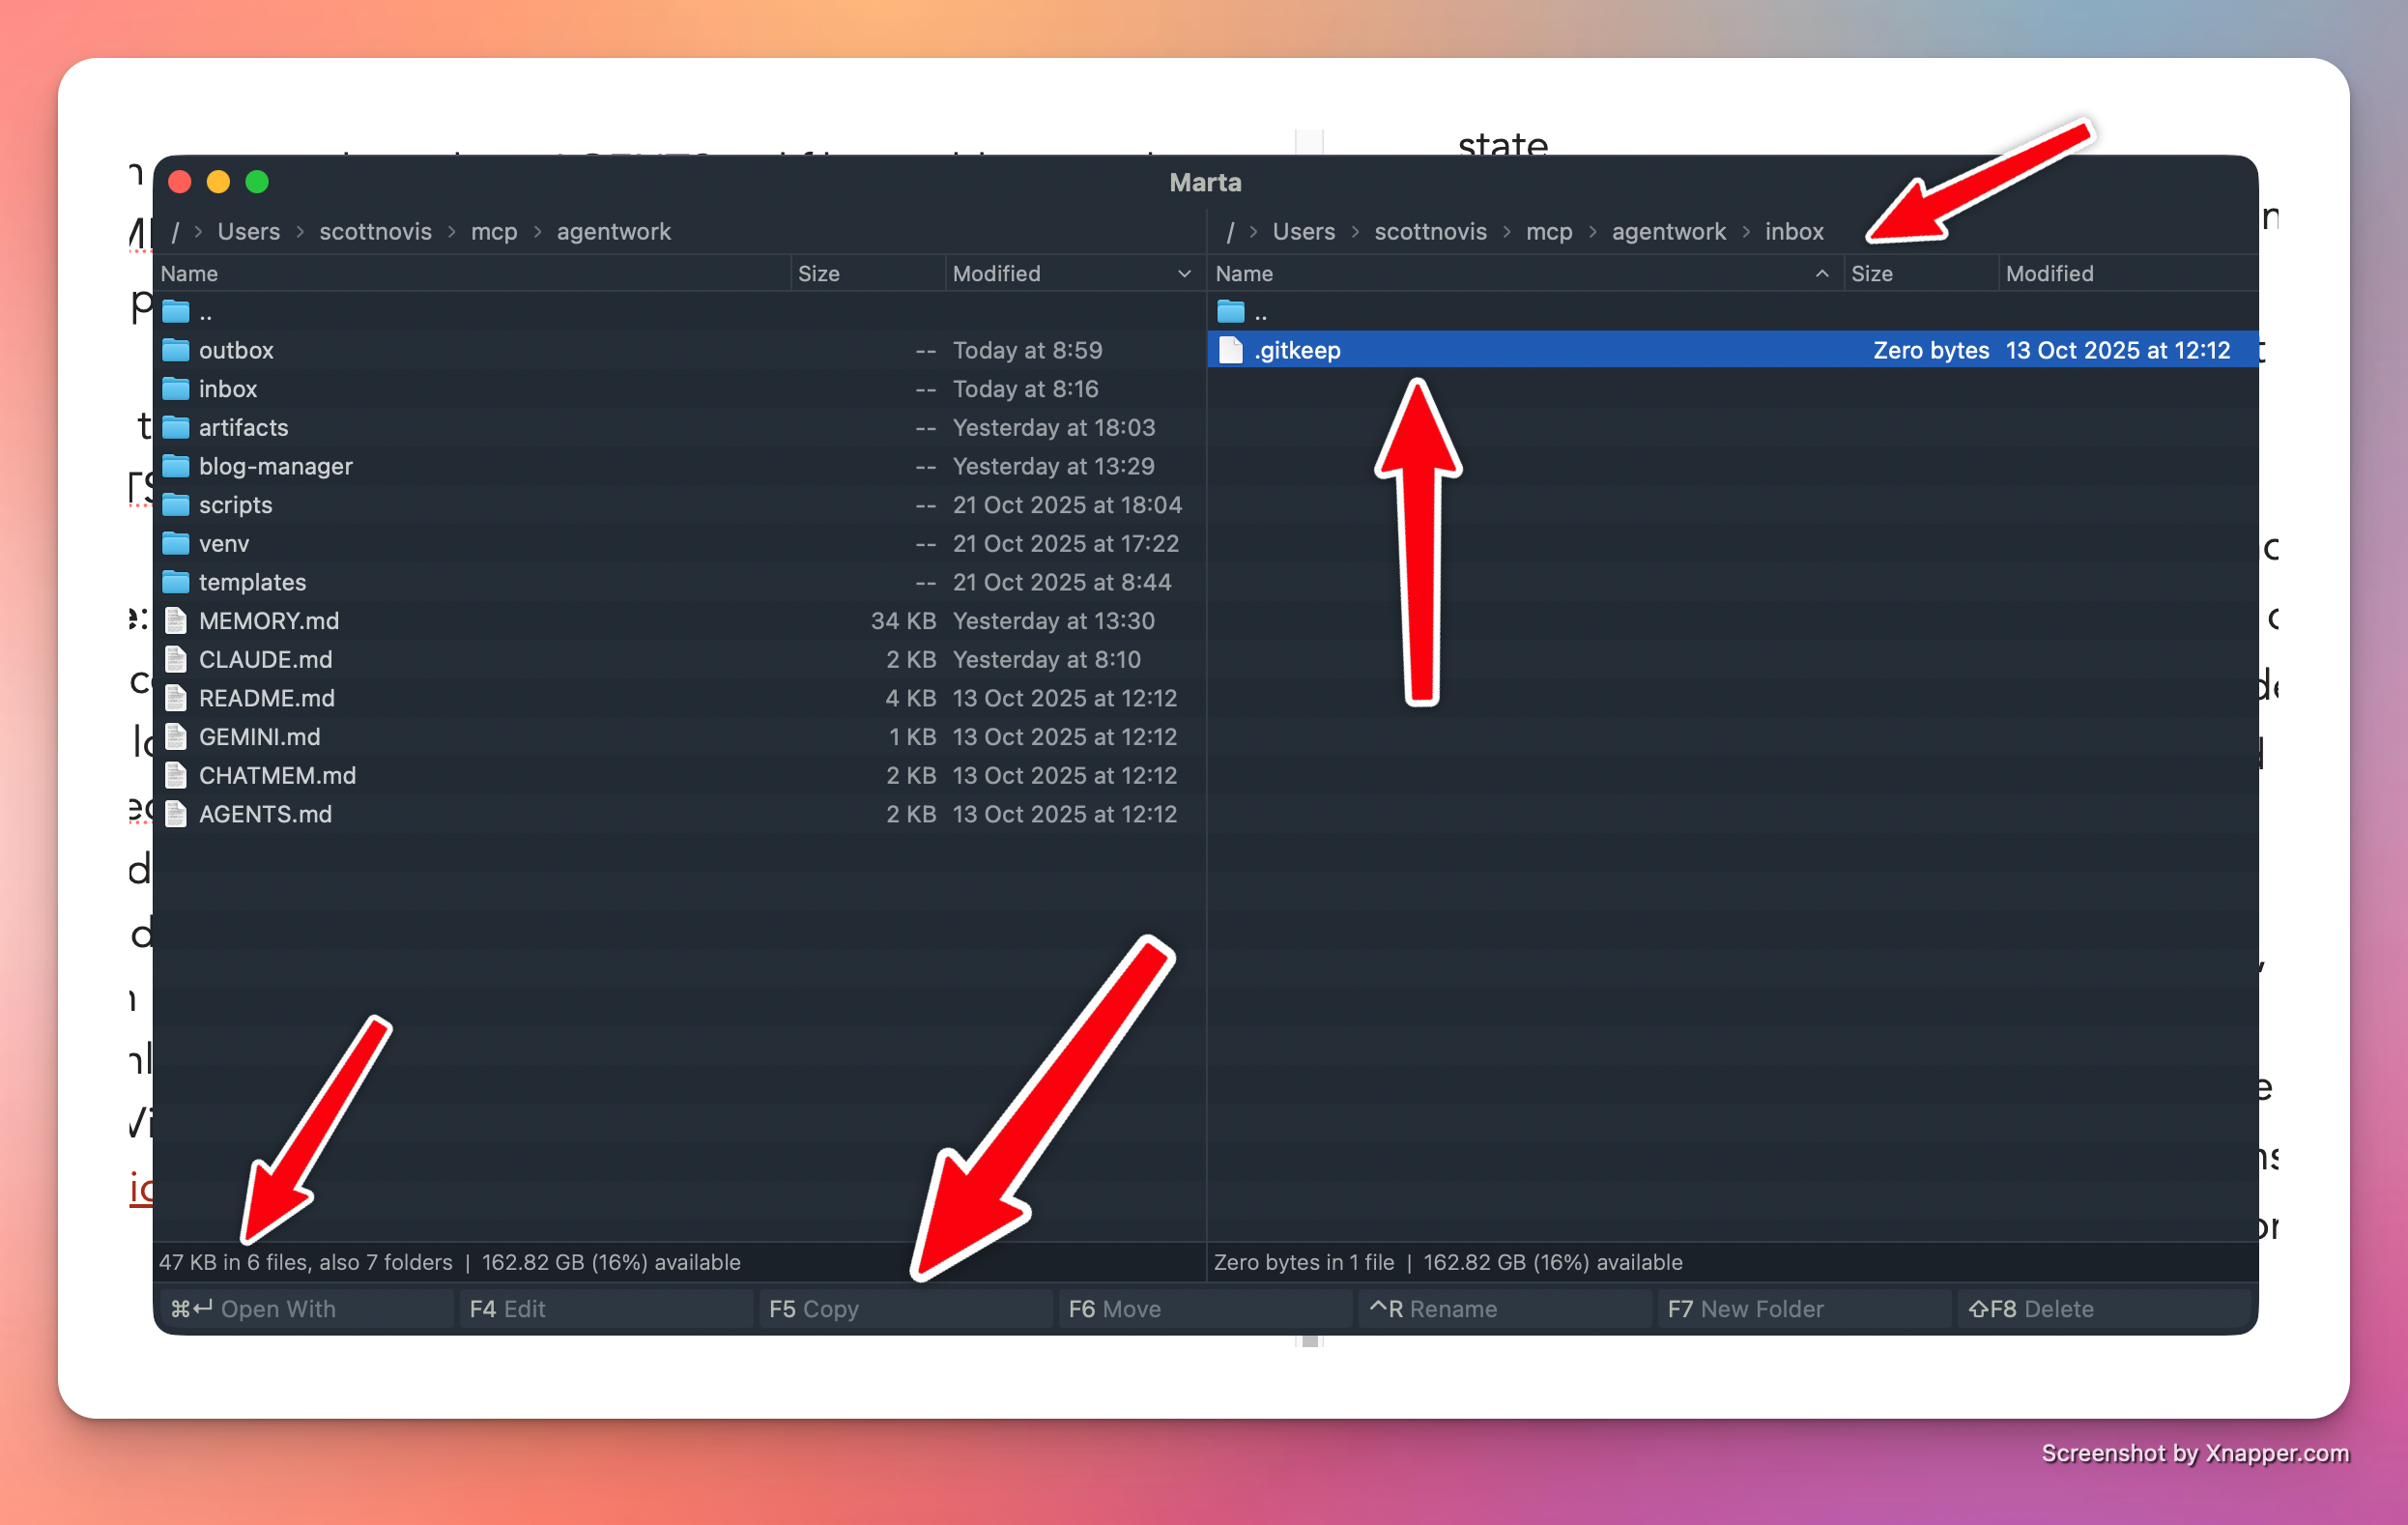
A great tool for moving files around. In the image I’ve highlighted a few things, but the main idea is that you can compare two directories side by side, select any files you want, and then copy them to the other pane (folder). Marta makes it easy to move files around, which I do a lot of when I start working with code.
VSCode
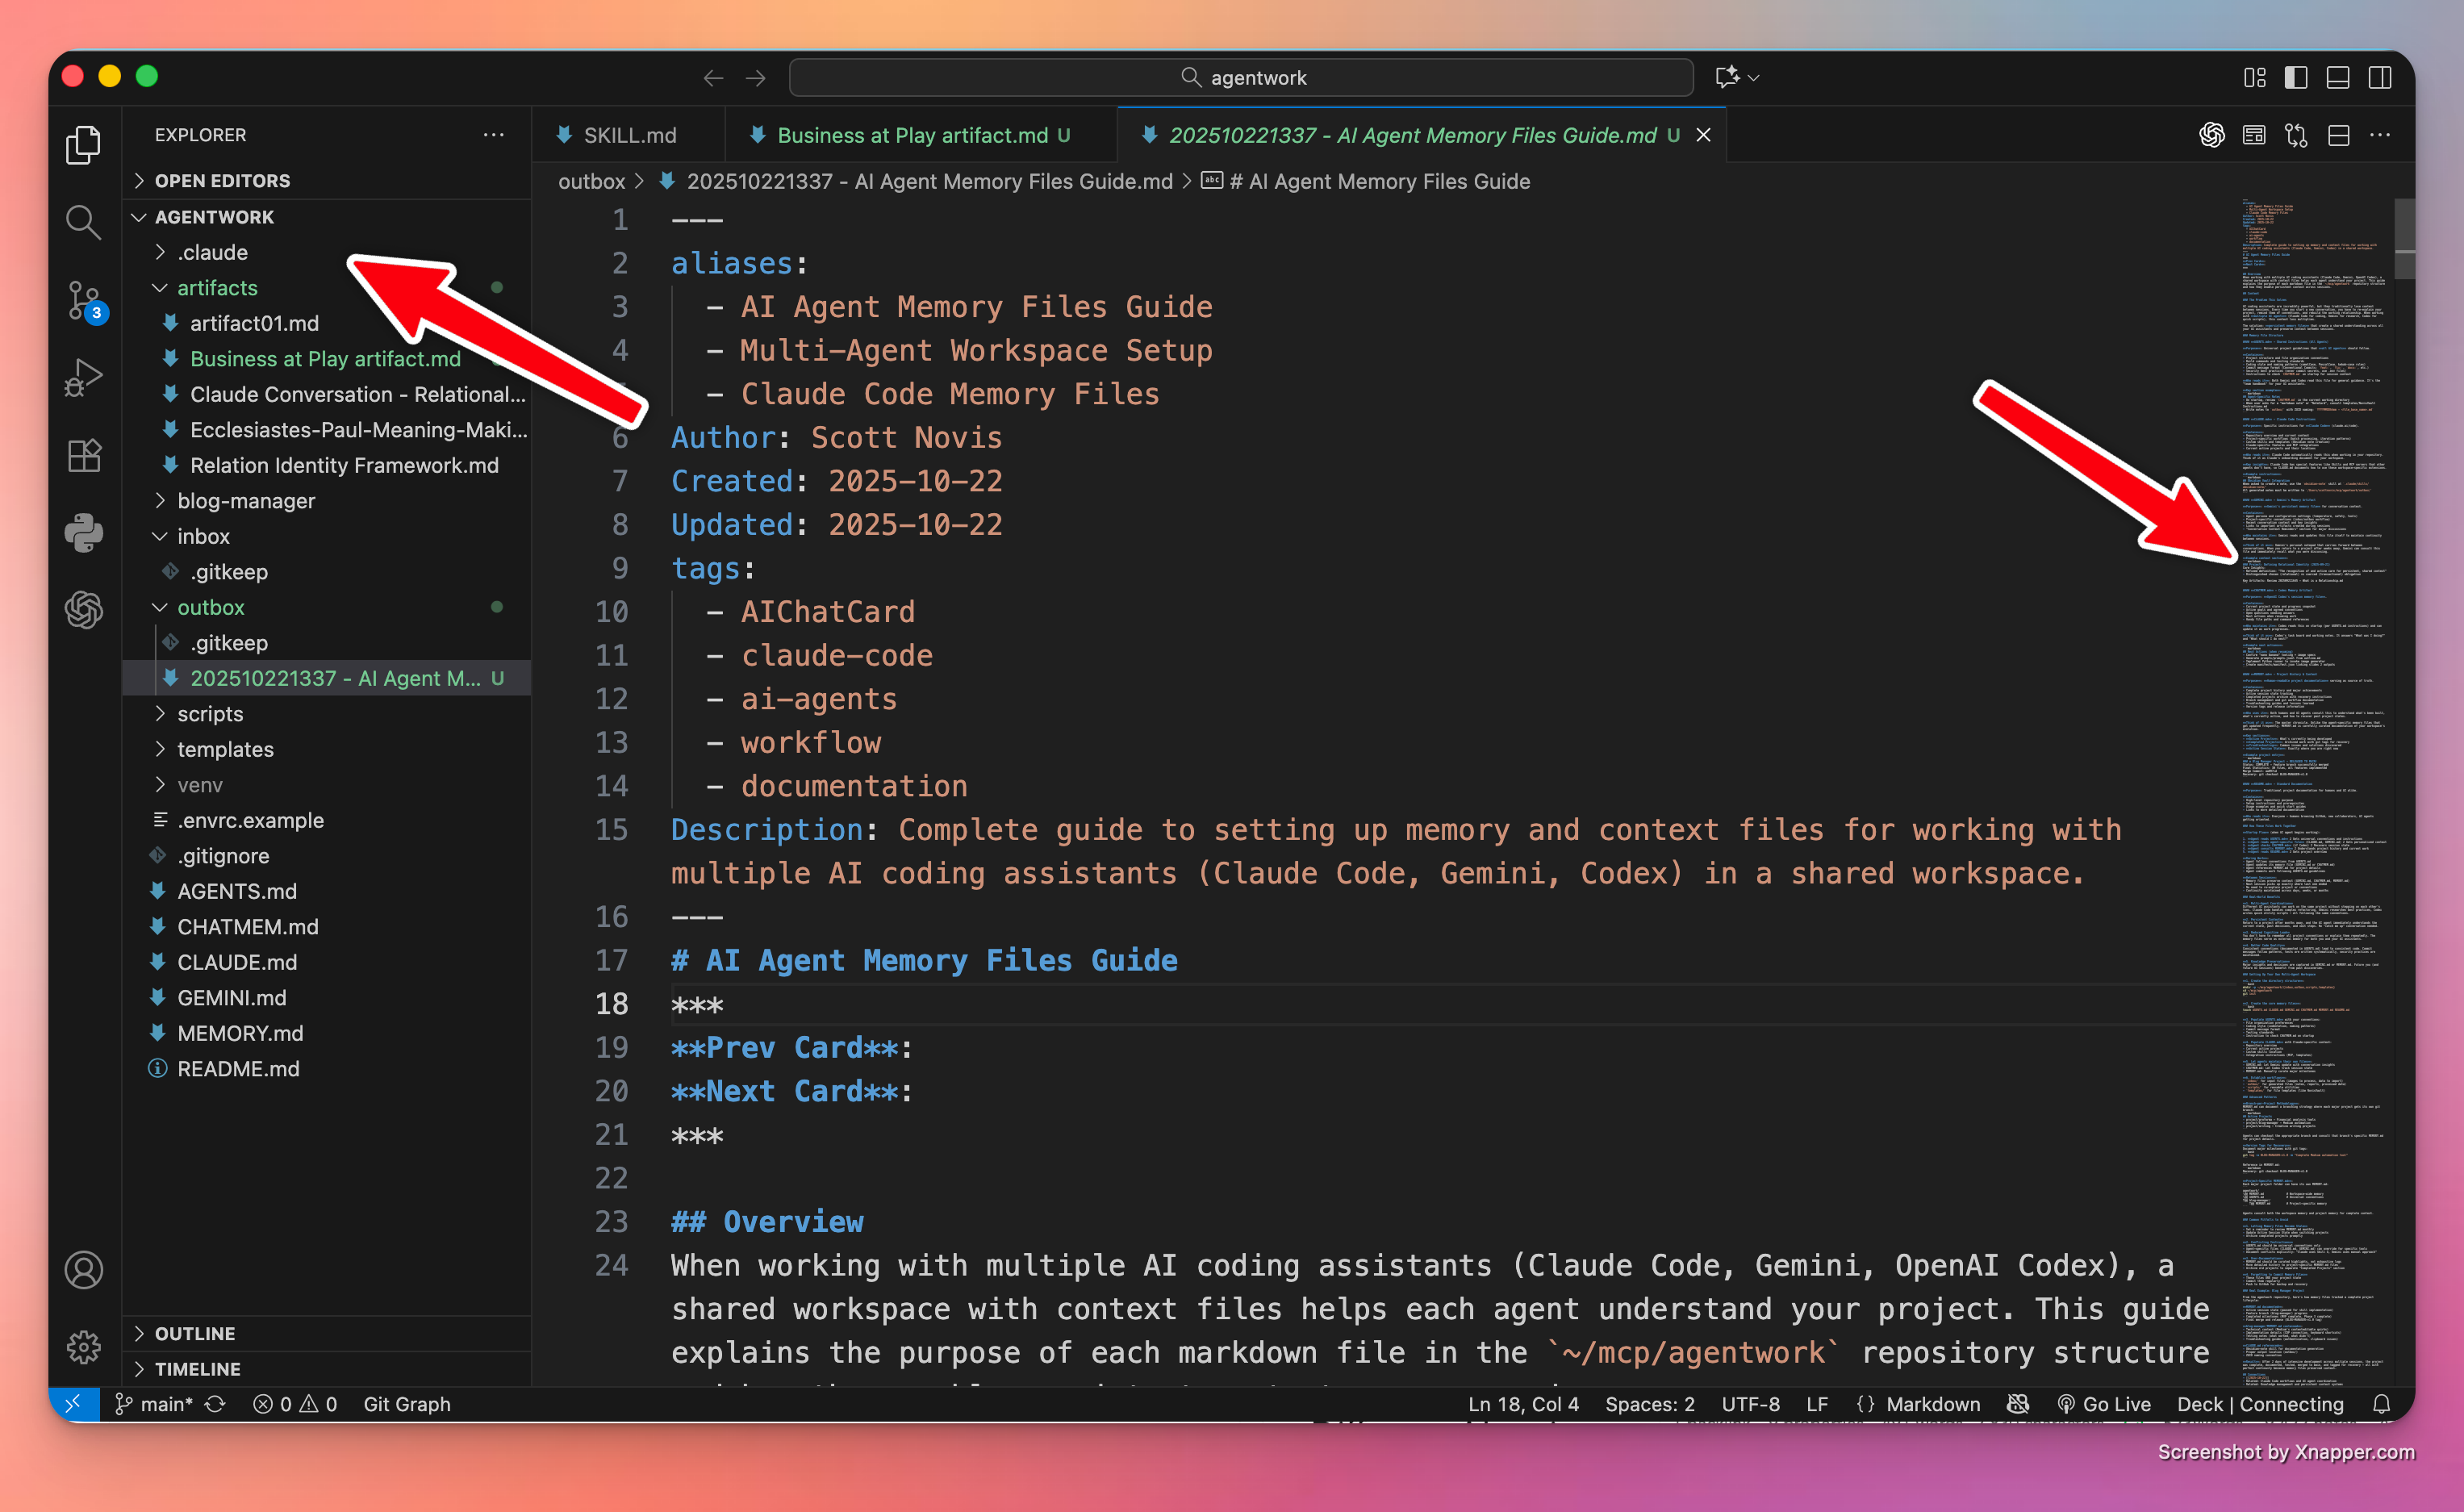
I’m just going to say it: VSCode is the best code editor around. It is amazing. And I have a lot of code editors. Some I really liked for a long time (sorry BBEdit), but VSCode is hands down my go-to text editor. And one reason it’s so powerful? I can open the agentwork folder, see what’s in it, and any file I click on opens in its own editor tab. VSCode lets me keep an eye on files written and created by Claude Code, Codex AI, or Gemini CLI.
After you get VSCode installed, open your agentwork folder. Now get ready to have some fun. Run the terminal program, then enter:
cd ~/agentwork
claude
Claude Code
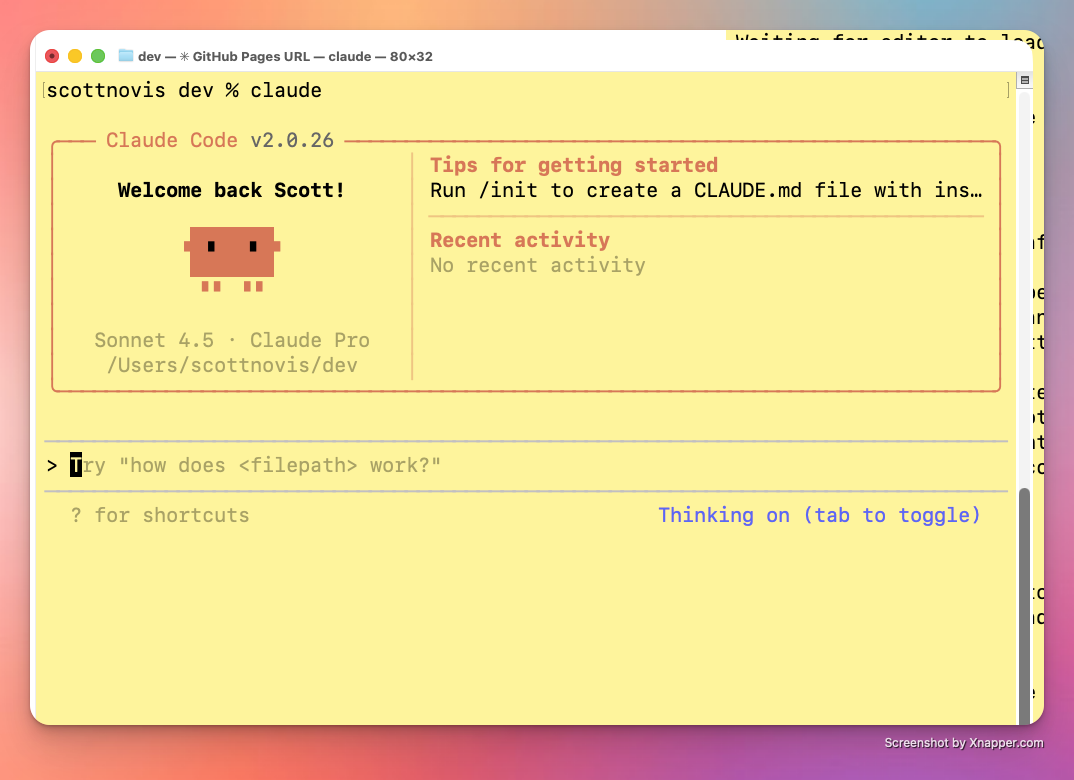
When Claude starts, the app prints its version number, some tips, a friendly robot face, and the prompt. In fact, in this screenshot it tells you that if you enter:
> /init
Then Claude will write a CLAUDE.md memory artifact. You can try that now, or skip ahead and keep reading… but then come back to it.
When Claude fires up, ask him (Calling Claude “it” didn’t feel right) to create the AGENTS.md file in the root directory of your project. The prompt could look a lot like this:
Can you please create an AGENTS.md file for this project in the root of this project? I want it to hold basic commands which you read on startup.
Now hit return and watch Claude do his magic. Almost immediately, Claude will try to do something with your files and the app will ask for permission. Pressing 1 grants one-time pass. Hitting 2 gives the AI carte blanche for that kind of command for the rest of the session (if you quit the app by typing exit, the permissions reset).
I do think I’m getting a sense of how the world ends. Someone yells at an AI agent while also granting them total autonomy: “Stop asking me questions. Just do the obvious thing!”
If you glance at your VSCode screen, you should see new files. If you click on the file, you can see its contents.
Time to Check In
At this point, I suggest you direct Claude to check in the new changes and push to origin. The command is literally what I just wrote:
please check in all changes and push to origin.
Claude will spin for a moment, then try to execute a git command, and you’ll have to give it permission. And then… it will take care of it for you, adding a comment, staging the file, then checking in the change, and finally pushing the new files to the cloud on GitHub.
Congratulations, you’ve started vibe coding. You’re directing, the AI is implementing and executing.
Inbox / Outbox
I also recommend adding two folders to your project. One is for files you want to process, the other is for files created by the AI. Inbox and outbox. You can easily add these two folders with the following commands (on MacOS) in the terminal.
Note: I always have several terminals open. One for each agent, and one to enter commands myself. Sometimes I like to run the commands myself as a way of staying in touch with what the AI is doing.
The simple commands are:
cd ~/agentwork
mkdir inbox
mkdir outbox
Now, there’s one other thing. Git will not store an empty directory. It only stores files. So to make sure these directories stay as part of your project, run the following commands:
touch inbox/.gitkeep
touch outbox/.gitkeep
Putting an empty but “real” file in the directories will cause git to track them and thus keep the directories. So .gitkeep is a convention, not an official part of git.
You can now tell Claude to update the AGENTS.md file with the following information:
Please add to the AGENTS.md file that the agent should look in the inbox to find files that need to be processed, and write new files in the outbox folder. For example, if I ask you to convert an artifact into an Obsidian note, you would find the artifact markdown file in the ~/agentwork/inbox and write it to ~/agentwork/outbox.
Claude will spin away, updating the agent file with this direction. From now on, the agents will know about this direction. So the AGENTS.md is like project-level instructions. The MEMORY.md file ends up being sub-project or task-related instructions, and those go into subfolders when I start new projects. But more on that later.
Ask Claude to check in and push all changes to origin. You want to do this early and often.
A Simple Project
Here’s something you could do to test your system. Record some audio of an event you’d like to turn into a story. Storytelling is hard, and too often we talk about the “stuff” and not the meat of the story. Use Otter, or your favorite voice-to-text app, and then put the raw text into a file in your project inbox. Now, direct Claude Code to find that file and help you turn it into an engaging story or anecdote. Remind Claude you want its help to “fix” the story, but make it simple enough that you can repeat it at your next coffee or forum meeting. Claude should render the output into the outbox in markdown format.
Let’er rip!
Inspect the results.
At this point, you can give Claude some feedback and have it revise the story until you’re happy. Then I would ask Claude to check in all changes.
Note: I used this method to proofread this blog post. Wrote it in Obsidian, put a draft in the inbox, had Claude proof it, which wrote to the outbox, then I added the new revision back to Obsidian by copying it. (I’m still not super comfortable with Claude writing directly into my vault—not comfortable at all, but maybe someday.)
At this point, you could begin some projects, but I think one of the most important things you’ll want to do next is install a Model Context Protocol server (MCP) for local file access so you can have Claude Desktop create files that your Claude Code can use. We’ll tackle that next.